Showing posts with label Kits. Show all posts

Tuesday, 29 March 2016

Boltz terrain

This week I have been suffering with the dreaded man flu so while on line I found a new terrain  company called Boltz.

Boltz are based in the uk and provided mdf terrain and tokens for all different sorts of games and in different scales such as 15mm and 28mm. The prices are really good as well costing only a couple of pounds.

While looking on the site I notice they where giving a 15% discount on everything until Salute result.

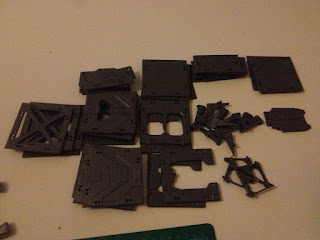
This is what I got.


These sets were nice to put together and there is even PDF guides on their site which are very easy to follow.  

I love the fantasy football score board which will come in handy with the Guildball demos being planed. The gate and fountain will be great for a lot of games.

If you looking for some mdf terrain or tokens for Guildball etc defiantly check out www.boltz.co.uk and remember you get 15% off.

Thursday, 10 March 2016

Plague Lands Wargames Bakery's BASIUS 2.5 - Base Stamp


A few months ago I backed Wargames Bakery BASIUS 2.5 Base Stamp on kickstarter and it came earlier then expected which is always a nice surprise.

I chose the plague lands mould as I thought it would cover a lot of games.  It has some great rough terrain plus a board walk, ropes and even has a coffin.


I had a go first by adding some water and applying some green stuff to see how it would go. As I thought it was difficult to get of but leaves a good impression. As this was a test on the area it left a decent result.


So after a few go's I managed to get this result. It's not to bad for the first go and I can tell that with a bit more practice this is going to be a sound investment.

If you interested check out  www.wargamesbakery.co as they do lots of different designs from space stations, cobbled streets to woodlands.

Sunday, 6 March 2016

Saturday Hobby Day

After last weekends early start and adventures I needed a rest and what better way is do do some hobbying.

The day started with the delivery of my Warhammer rule book and it's massive...all I have to say I love eBay it cost me £3!!


 After having a quick look at the rules and looking at all the minis I dug out my Kings Of War dwarfs which I have lot more then remembered and I hope this lot will get me through my first couple of games.


So now I have my minis I started off making some movement trays from some spare foam board and wooden sticks. This was a random idea I had just to get started with Warhammer so I can then maybe upgrade to the plastic trays later on. Once all the glue was dry I gave it a quick undercoat of black paint and added some gravel around the edge to hide the cutting marks from the board and make it look a bit more interesting.


Next up was making some forest terrain from the remaining foam board. During the week I picked up some sticky green felt and thought this would be great to give me a quick and easy grass effect. I cut out two shapes that would cove a decent area on a board and proceeded to cover with the felt. The end result came out all right. I think I am going to try and make a few smaller ones for rough terrain and smaller woods.


Next up was painting two dwarfs which will be used in my new Warhammer army but at the moment they are going into my Frostgrave war band. So now I have 2 crossbow men and my war band for Frostgrave is all painted..


Well it was not a bad way to spend a Saturday. It's great to get these projects finished today as some have been on to do my list to finish for a bit now.
So now i'm off to my next build but first I think now would be a good time for a cup of tea.

Friday, 19 February 2016

Frostgrave PT 3

As I prepare for Frostgrave I have been watching a few bat raps and in one of the games it had 6 statues which randomly came alive and attacked once you pick up some treasure.

This got me thinking. When I bought the castle at Christmas for this game it came with some knights that I would probably never use so I thought well they will be just sitting there and they seem to be in a good scale size to make some statues.

I started off by glueing and basing the models on to 50mm bases. Some uniform grey spray from army painter was used and a splash of army painter white to get a snow like effect.

Hay presto instant and quick statues.


As objectives are the main aim in the game I looked around eBay I found some resin treasure chests for a couple of pounds. I was supposed to get 10 but some how got 14. Result!


I glued these to some 25mm MDF bases and sprayed grey (my new primer colour of choice) I added some brown and chaos black to the leather straps with a little bit of shining gold for the locks. Then with a splash of snow done.

I was thinking as I finished my war band I probably will need some crossbow man. As I am doing this on the cheap I raided my collection and found these two fellas for my crossbow man.


This little project turned out pretty well for a quick job I just need to paint these dwarfs up now and still got to sort through what spells I want to use..


Monday, 8 February 2016

Welcome To The Deadzone Pt 3


This weekend I started to have ago at building the terrain in the Deadzone box set. I have heard that this will need a little care when clipping and cleaning the pieces as the hard plastic can be a bit tough.


After cutting all the parts an cleaning I went about dry fitting the pieces together. I can tell you that the connectors that come with the kit can be tricky to fit and sometimes they did not connect properly so you do have to do some jigging and cutting. Also another fact is that you don't get that many of the connectors which is a shame as it does limit build options and if they snap which some did it can be a little frustrating.

Luckily before I started to build this terrain I made this landing pad which gave me lots of spare corner joints.


As you can see it's massive! Unfortunately even with this kit like the Deadzone terrain it did not come with enough straight connectors. I had to use some of the feet connectors and super glue to strengthen it in the end.
The picture on the bag made it looked like it should have came with more wall parts to make the barricade where the gun sits behind. I am not sure if I am missing a sprue or not as there are no instructions with any of the kits from mantic at present to check this.

After dry fitting everything I decided to go for this lay out. It has a tower and a few single block buildings and walls to give as much cover as I can get.


As its advertised as modular terrain it does the job but I would not recommend keep changing it around as un doing what you have made can cause the connectors to snap so defiantly plan then dry fit a little and use supper glue.


I do have another box of this terrain so this has been a good test run. I am going to plan out a design before I start work on that as it has a lot more goodies so I will try and add to what I have made so far.


So the terrain is now built, models are primed and ready all that's needed is to enter the Deadzone.

Friday, 18 December 2015

Welcome To The Deadzone PT2.... Here Comes The Pain

In a box set the models are the main event for me so I was looking forward to begin building theses minis for Deadzone.

I started with the Plague faction. As I started to open the packets of minis I could see that my first inspection regarding the models needing a lot of cleaning came true. The models are made of a hard plastic a lot different from the normal GW materials I am used to.

The usual mold lines were present on them as well as some rough bits of plastic hear and there that needed snipping off.


I've Got Some Work To Do

With out any instructions it took me a little bit of time to figure out which arms fit to what model as some have pre made joints which made it a little easier to work. 
I would advise using super glue to stick these together as plastic glue did not seem to work.

On one of the models I had to repose jumping over the wall as his arm was to close to his knee.
I used some hot water and reposed the arm and fingers so it was out of the way of the way and managed to change it to a more dynamic pose by pinning the hand to the wall.


BOO!

I also changed the position of the arms on the model below from facing down which made it like a Hulk Hogan muscle pose and now its more of a bezserker rage pose.


Come At Me Bro!


The Gang


Next up were the Enforcers.

Again these needed the same treatment as the Plague with cleaning of mold lines and random bits of plastic. They seemed to need a lot more of a clean up then the Plague for some reason.

These models took a while to find all the right parts to fit especially the main troops as you had two arms that fitted a gun which need to be the correct length to work. Unlike GW plastics where they tend to stick in place with glue quickly these would not stay in place. They fell off before you could pose them in a shoulder socket and there was no real clue how far apart they needed to be to fit the gun in place.

So I had no choice but had to roll out the green stuff.  I had to use this for the arm joints as well as to help attach the body to the hip joints as the plastic did not connect right so glue would not work.

Thank You Green Stuff
The rocket launcher Enforcer was another challenge as I had to attach the arms in a way that left a huge gap.  I had to fill under the arm with green stuff.


Here Come The Boys

Well it was more difficult than I thought getting these made.  I have made lots of models before but with out instructions especially in a starter set made this less straight forward then it should be. I think even if Mantic could do a PDF guide this could be a big help. It became a case of trying to fit things a couple of times and then having to referrer to box art and the rule book to try and figure out the correct components for each model. 

There May Be Trouble Ahead.
I also just put these on to the bases and found some of them did not slot into the pre made holes which again needed to have some green stuff to help stick them in place.

I don't want it all to sound negative as the models once they are made look good.

The Plague models are what I am looking forward to painting as they do have a lot of character and I'm looking forward to playing a game with them.

It was just little things that could have been done to help make things go a little more smoothly.

So I am off now to start undercoating...


Tuesday, 15 December 2015

Welcome to The DeadZone Pt 1

A few weeks ago it was black friday. The usually emails and adverts flew into my email in box and I browsed through for any good deals.

One email came to my attention was from Mantic games. Mantic's special offer was their board game come skirmish game Deadzone for more then half price off.
I have played the game once at a salute a few years ago and have some of the Mantic terrain already so I decided I would take the plunge.

2 weeks later it arrived.....

The Big Box
Apon opening the box I could see all the lovely shiny toys but the one thing I noticed was the box contents was not packed with any foam or bubble wrap to protect any of the contents.

I found some tokens all ready pooped out and a part of some the terrain already lose from the sprue in the box.


I am more used to a well packed product like the AvP game so I am not to sure why this did not include any protective packing especially when sending it through the post.


Lots In The Box
The contents includes:

1 Full Colour A4 Rulebook
6 Eight sided dice
130+ counters
54 Card Enforcers Faction Deck
54 Card Plague Faction Deck

Urban Battlezone
2’x2’ Durable Urban Gaming Mat
28 Modular Plastic Scenery tiles
20 Piece Plastic Accessory Sprue
48 Piece Connector Sprue

12 Plastic Enforcers Miniatures
1 Enforcer Peacekeeper Captain
4 Enforcers with Heavy Rifle
2 Assault Enforcers
1 Enforcer Engineer
1 Enforcer Sniper

1 Enforcer Missile Launcher
Lots Of Terrain
2 Enforcer Sentry Guns
11 x 25mm Round Bases
1 x 40mm Round Base

11 Plastic Plague Miniatures
1 Plague Stage 1A
3 Plague Stage 2A
4 Plague Stage 3A
1 Plague Stage 3A with HMG
2 Plague Stage 3D “Hellhounds
7 x 25mm Round Bases
4 x 40mm Round Bases

Phew........


The rule book looks good and not to long in length which hopefully will mean it wont take long to learn and get playing.


Lots Of Minis!
The models look like they will need a lot of clean up and one thing I am a little worried about is building them as there is no instructions.. So for beginners getting into this board game/skirmish game may be a little put off by this. There are pictures in the rule book and on the box so I will see how I get on later.

The 2X2 gaming mat is nice and heavy duty just like the playmates that are now readily available that use mouse matt material.

One element I am a little disappointed in is the quality of the print on the mat. It looks a little grainy and blurred and some of the colours look green like the printer has run out of ink. It may be the design but its hard to tell due to the print quality.

I am not sure if its a faulty product but if it is I would have thought QC would have checked this but it could be the technology has also advanced since the release of the game.


Did The Ink Run Dry?
All in all I am happy with what I received especially at the price I got it for. I have seen lots of videos on game play and terrain builds  using the contents of this box.
I can see this is going to be a fun game that can be picked up and played with little fuss and as its only on a 2X2 it wont take up to much table space.

The other factions look interesting ( The Rebs look cool) and as the new update of Deadzone and new terrain coming out soon due to another successful Kickstarter by Mantic this year it could be just the right time to start playing.

Now off to start building the models...